Contact Categories
Create custom categories and group contacts strategically – for example by customer, supplier, athlete, or trainer. Keep your overview even with a large contact list.
What are Contact Categories?
Contact categories help you organize your contacts meaningfully. Instead of managing all people and companies in a long, unorganized list, you can assign one or more categories to each contact – like labels on a file folder. This makes searching and filtering much easier later on.
Examples of useful categories: Customer, Supplier, Athlete, Trainer, Company, Member, or Sponsor. You can add new categories, rename existing ones, or delete unused ones at any time.
Overview – See All Categories at a Glance
Navigate to Contacts in spooorts Manager and select Contact Categories. You'll see a table with two columns: Category (the name) and Description (optional explanation text). Each row represents an existing category.
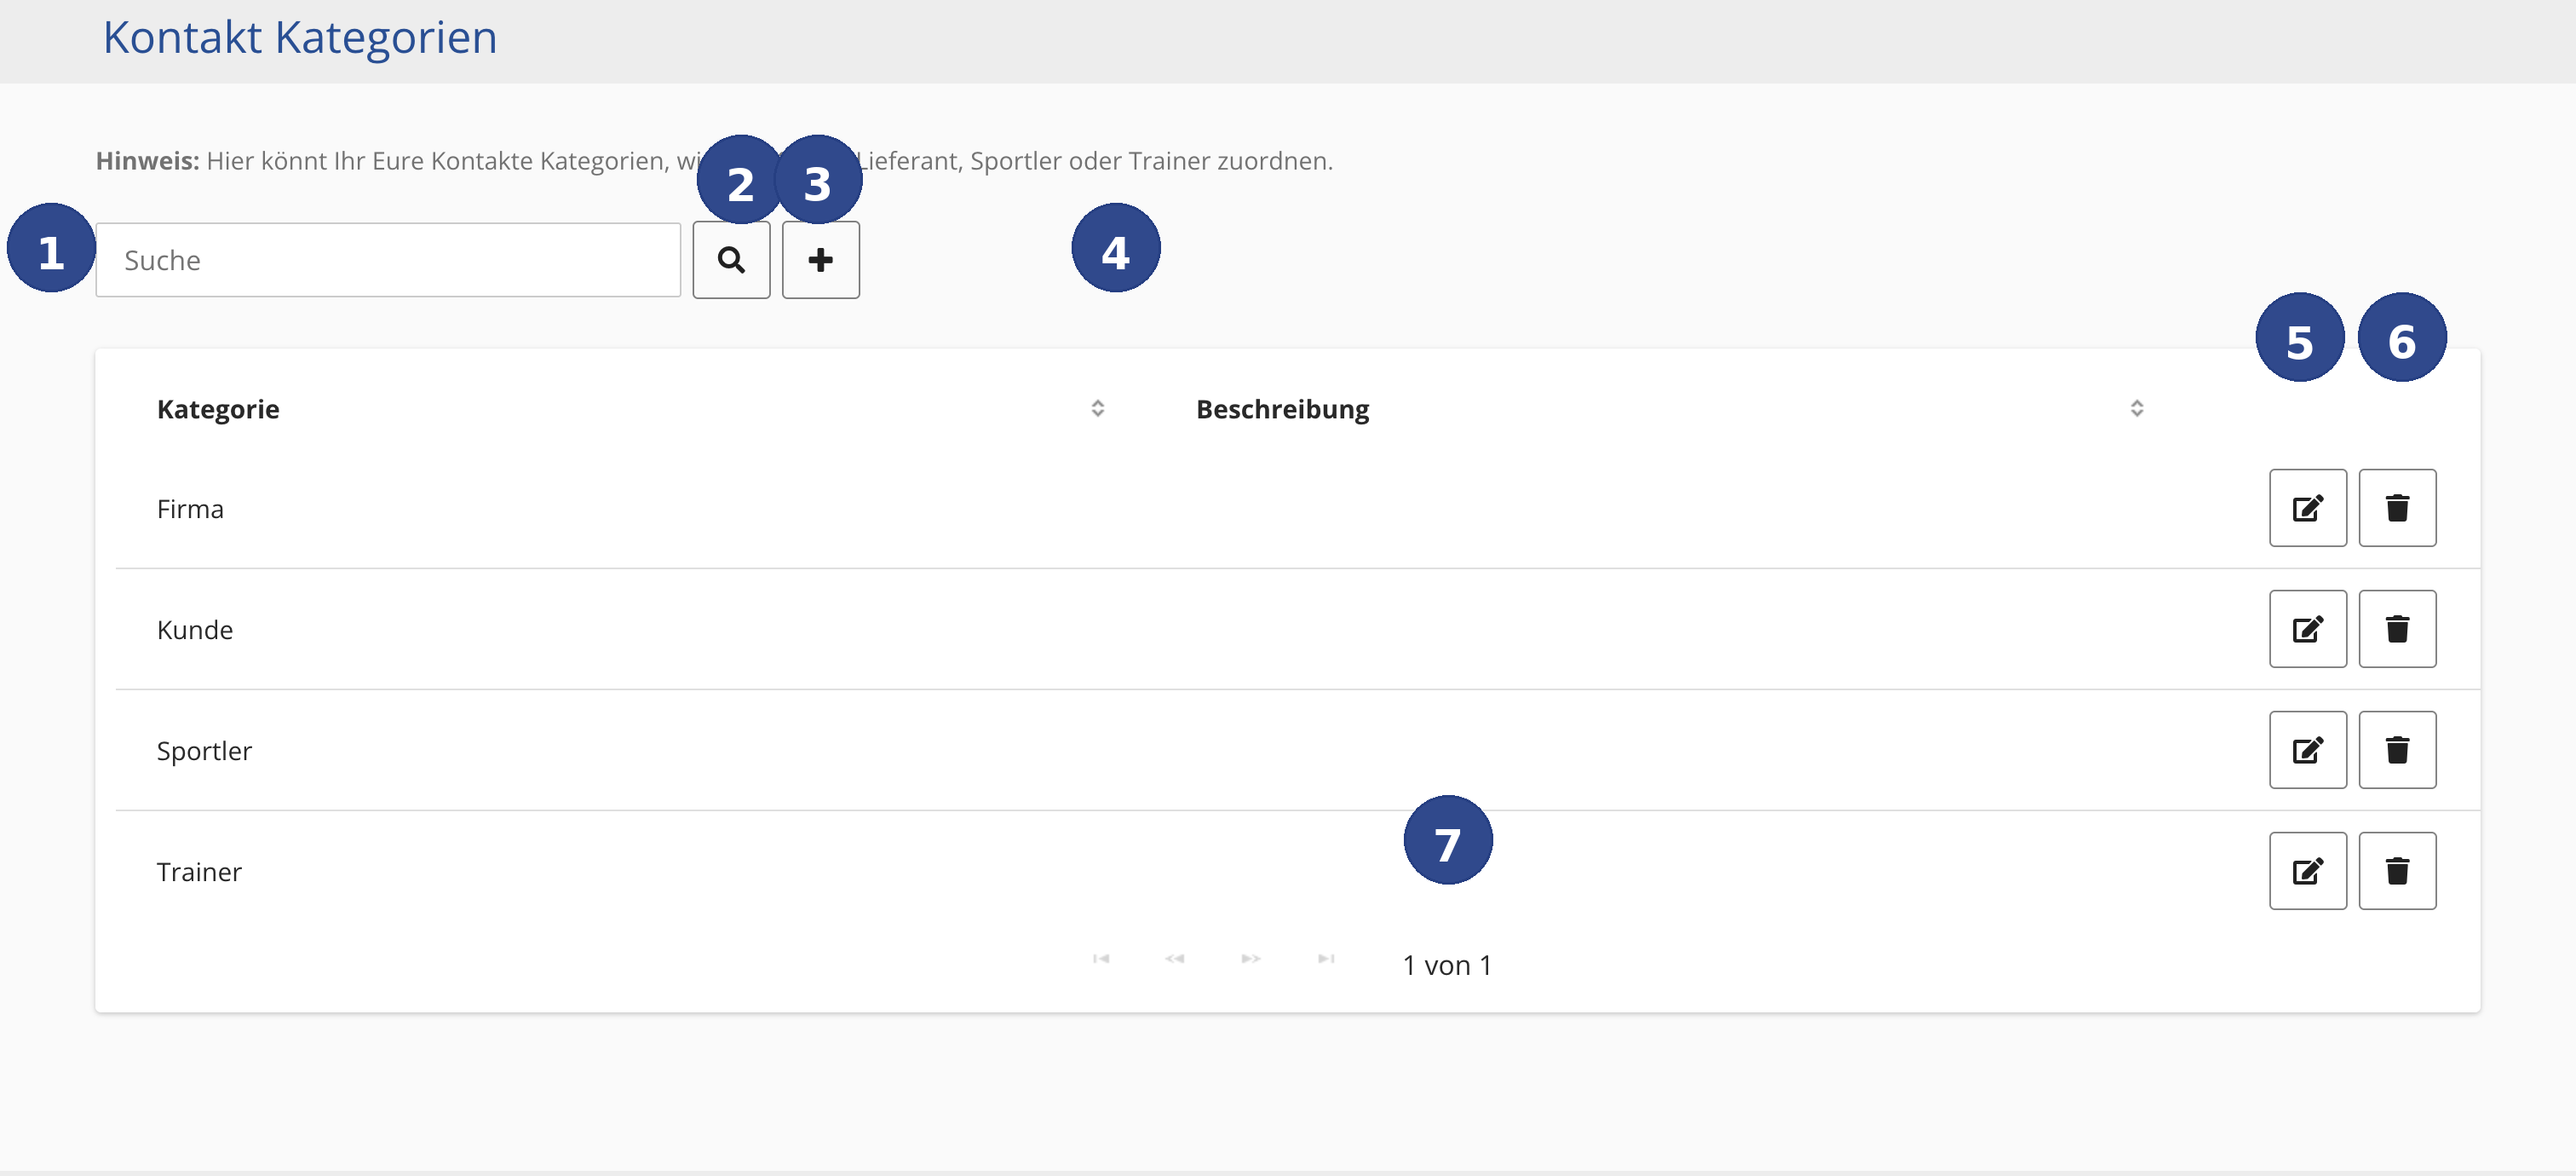
All Controls Explained
- Reference ① – Search field
- The text field at the top left labeled Search. Type a search term here to filter the list of categories.
- Reference ② – Search button
- The magnifying glass icon next to the search field starts the search manually. Click it to show only matching categories.
- Reference ③ – Create new category
- The plus symbol (+) opens a form where you can create a new category. Enter at least a name – a description is optional.
- Reference ④ – Sort columns
- The small arrows (↑↓) next to the column headers allow you to sort the list alphabetically.
- Reference ⑤ – Edit category
- The pencil icon at the right edge of each row opens the edit view for that category. You can change the name and description.
- Reference ⑥ – Delete category
- The trash can icon next to the pencil icon permanently removes a category. A confirmation dialog appears before final deletion.
- Reference ⑦ – Page navigation
- Below the category list is the page navigation. It shows which page you're on and how many pages exist in total.
Step by Step: Create a New Category
Here's how to create a new contact category:
- Click the plus symbol at the top right above the table.
- A form opens. Enter a meaningful name in the Category field, e.g. Sponsor or Club Member.
- Optional: Enter a short explanation in the Description field so your team knows when to use this category.
- Click Save. The new category appears immediately in the list and is available for all contacts.
Assign a Category to a Contact
You don't assign a category directly in this overview, but in the detail view of the respective contact. Open the contact you want, find the Category field, and select one or more of the created categories. Confirm with Save.